Why Golden Hour Is the Best Time for Your Photoshoot
Why Golden Hour Photography Matters Golden hour photography is one of the most popular techniques used by photographers. This period happens when the sun is low in the sky. The light during this time looks soft, warm, and natural. Because of this, many photographers prefer golden hour for different types of photography. This lighting helps reduce harsh shadows and strong contrasts. It also adds a cinematic feeling to photos. For beginners and professionals, golden hour provides ideal conditions to capture high-quality images without complex equipment. When Does Golden Hour Occur? Golden hour happens twice every day. It appears shortly after sunrise and just before sunset. The exact timing depends on your geographic location and the season of the year. Photographers often use online tools or mobile apps to track the exact time. Planning ahead allows them to arrive early and prepare their camera settings. This preparation helps them take full advantage of the changing light. Why Light During Golden Hour Is Special The light during golden hour comes from a lower angle. This angle creates long and soft shadows. It also spreads light evenly across the subject. As a result, skin tones look more natural and colors appear richer. Another important benefit is the warm color temperature. This warmth makes photos feel emotional and inviting. Many photographers use golden hour to tell visual stories and create mood in their images. Benefits of Golden Hour Photography Golden hour offers several advantages. First, it provides soft lighting that flatters faces and objects. Second, it minimizes harsh highlights and dark shadows. Third, it enhances textures and details in the photo. This type of lighting works well for portraits, landscapes, lifestyle photography, and even product photography. Because the light is natural, photographers can rely less on artificial lighting. Tips for Shooting During Golden Hour To get the best results, photographers should arrive at the location early. This gives enough time to test different camera settings. Shooting in manual mode can help maintain control over exposure. Photographers should also experiment with angles. Shooting toward the sun can create creative silhouettes and lens flare. Shooting with the sun behind the camera produces even lighting on the subject. Using a reflector can also help bounce light onto the subject. This technique works especially well for portrait photography. Common Mistakes to Avoid One common mistake is arriving too late. Golden hour does not last long, so timing is important. Another mistake is using the wrong white balance. Adjusting white balance helps maintain natural colors. Some photographers also forget to adjust exposure as the light changes. Checking settings frequently helps avoid underexposed or overexposed photos. Who Should Use Golden Hour Photography? Golden hour photography is suitable for all skill levels. Beginners benefit from forgiving lighting conditions. Professionals use it to enhance creativity and consistency. This technique works well for social media content, portfolios, and commercial photography. Many brands prefer golden hour images because they look warm and authentic. Conclusion Golden hour photography is a powerful technique that improves photo quality. It offers soft light, warm tones, and natural contrast. With proper planning and simple techniques, photographers can create stunning images. By understanding when golden hour occurs and how to use it, photographers can consistently produce professional-looking results.
What to Wear for Your Photoshoot: A Complete Style Guide

Choosing what to wear for a photoshoot can feel stressful, but it doesn’t have to be. Your outfit has a major influence on the overall mood and outcome of your photos. For sessions with Sun & Soul Photography, I always encourage clients to choose outfits that help them feel confident and comfortable. This guide breaks down everything you need to know. Pick Colors That Photograph Well Neutral colors—like cream, beige, brown, navy, and olive—photograph beautifully and work in almost any location. Avoid Large Logos and Busy Patterns Logos and bold patterns distract from your face. Simple clothing works best. Coordinate Colors (Don’t Match) For couples or family sessions, coordinated colors look elegant without feeling forced. Wear Comfortable Clothes If your clothes feel uncomfortable, your photos will show it. Pick outfits that fit well and allow you to move naturally. Dress for the Location Your outfit should match the setting. Soft colors for outdoor shoots, modern styles for downtown sessions, etc. (Internal link to Blog Post 1: “How to Look Natural in Your Photos”)(Internal link to Blog Post 3: “Why Golden Hour Is the Best Time for Your Photoshoot”) Use Simple Accessories Minimal accessories like small jewelry, hats, or layers add depth without being distracting. Conclusion (CTA) The right outfit helps your personality shine. Sun & Soul Photography offers outfit consultations if you need help choosing the perfect look for your session. (What to Wear for Your Photoshoot) Be comfortable The options are endless when it comes to picking an outfit for your photoshoot. Do you go full glam, dress like a tourist, or opt for a more casual piece of clothing? In reality, the best option for a Flytographer shoot is to wear what you feel most comfortable in! Try to avoid restrictive clothes that take the focus off having fun on your shoot. Nothing is more flattering to your figure than an outfit that truly fits well. Wear clothes that make you feel most like yourself—it makes a huge difference! Statement outfit ideas Think about your destination, your route, and the vibe you want to achieve in your final gallery of photos. Long flowy dresses paired with a beautiful background are perfect for evoking feelings of a magical or romantic moment. Plus, they’re breathable, comfortable, and so cute! Jumpsuits and rompers are also super comfortable and easy to wear, which is the most important thing during your shoot. If your shoot location is at the beach, we love seeing florals! This pattern creates a relaxed and laid-back vibe, especially in family photos. If you’re doing a modern headshot or professional photoshoot, blazers in bright colours or fun patterns are a great way to take your photos to the next level. Engagement photo outfits You’re engaged! This is a special time that absolutely needs to be documented with a photoshoot. Perhaps you’ve gone from thinking, “I think my boyfriend is going to propose… what should I wear?!” to “We’re getting engagement photos taken… what should I wear?!” Elevated Looks For a lot of couples, engagement photos can be a time to shine! There aren’t too many opportunities to really get dressed up and show off together, so if stepping up your look feels like something fun you’d like to try, an engagement photo session is a great opportunity to take advantage. Neutral Colour Palette You really can’t go wrong when it comes to a neutral colour palette. Neutral and earth tones that stand out against your backdrop are timeless and highlight both you and your partner as the main subjects. Patterns When it comes to patterns, don’t be afraid to use them, but choose wisely. Look to your location or the season for inspiration! It’s usually best to have one person wearing a pattern and the other wearing a solid colour that features in the pattern. At the end of the day, your engagement photo outfits should be comfortable and look and feel like YOU!
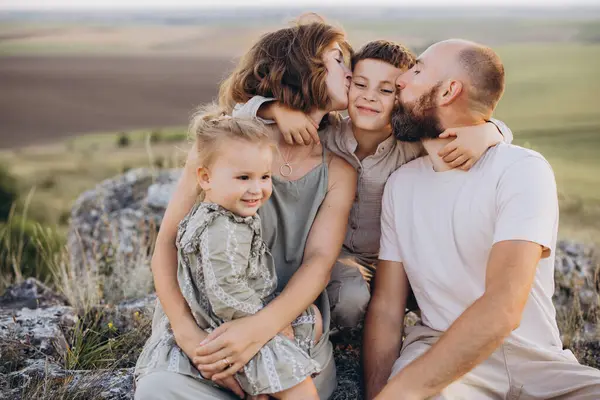
How to Look Natural in Your Photos: 10 Simple Posing Tips

Looking natural in photos is something many people struggle with, especially if they’re not used to being in front of a camera. As a photographer, one of the most common things I hear from clients is, “I don’t know how to pose,” or “I always look awkward in pictures.” What most people don’t realize is that posing is a skill—anyone can learn it with the right guidance. At Sun & Soul Photography, my goal is to help every client feel comfortable and confident, and these ten simple posing tips are a great place to start. Shift Your Weight to One Leg Standing with weight evenly on both legs can make your posture stiff. Shifting your weight slightly to one side instantly looks more relaxed and natural. Angle Your Body Instead of facing the camera straight on, turn your body about 15–20 degrees. This adds dimension and is much more flattering. Stop Right Before You Kiss Sounds counterintuitive, right? But the “almost kiss” is often so much more romantic on camera. It’s that little moment of anticipation — soft smiles, slow movement, a little breath between you. Trust me: it gives all the feels. Breathe I know, groundbreaking. But when nerves kick in, a lot of us forget to breathe naturally — which can make you look a little stiff. Take a deep breath, let your shoulders drop, and try to stay loose in your body. (Bonus: it helps with blinking and genuine expressions, too.) Chin Down, Not Up I know your instinct might be to lift your chin, especially if you’re feeling camera shy. But a slight downward angle is way more flattering in photos — it elongates the neck and avoids that “looking down your nose” feel. Add Some Movement Whether it’s a hair flip, a dress twirl, a slow walk, or pulling each other in for a spin — movement makes your photos feel alive. Even something as simple as gently swaying or grazing the flowers in your bouquet can add a soft, romantic touch. Don’t overthink it — just move in a way that feels natural. I’ll take care of the rest. Relax Your Hands Tense hands are one of the biggest signs of discomfort in photos. Keep your hands relaxed—lightly in your pockets, touching your clothes, or at your sides. Drop Your Shoulders and Breathe People often raise their shoulders when they’re nervous. Taking a slow breath helps you relax your posture and look more natural. Use Movement Movement makes photos look candid and real. Try walking slowly, fixing your hair, or adjusting your jacket. Look Away from the Camera Not every photo needs direct eye contact. Looking slightly away creates a calm and natural mood. Use Your Environment Leaning on a wall, sitting on a bench, or interacting with your surroundings helps you feel more comfortable and makes poses feel natural. Smile Naturally Instead of forcing a big smile, think of something funny or meaningful. Natural smiles always look better. Communicate with Your Photographer If a pose feels uncomfortable, say so. Your photographer can adjust the angle or suggest something better. Trust the Process It’s normal to feel awkward at first. Once you warm up, your expressions and poses naturally improve. Conclusion (CTA) Looking natural in photos is all about relaxing and trusting your photographer. If you want a comfortable, guided photoshoot experience, book your next session with Sun & Soul Photography. For more preparation tips, check out my next post: What to Wear for Your Photoshoot. https://studioanne.co/2025/06/18/10-simple-posing-tips-for-natural-beautiful-photos/